

Setting Up Google Tag Manager
For my first blog post I thought it would be helpful to go over how to set up some basic Google Tag Manager tracking. Since I am A) in the early stages of setting this website up and B) a web analytics implementation specialist. It would be embarassing if I didn’t take this chance to add and document the process for adding GTM to a simple website.
What You’ll Need
- a website (duh)
- a free google analytics account
- a free google tag manager account
Google Analytics
I’m not going to walk through the process of creating an account, but once you have Google Analytics account you will be able to author a “Property”. Accounts and Properties form a heirarchy to help your organize your Analytics setup if you have more than one website. If I had three websites, I would still have one account, but I’d have three properties to break out the data at a website level.
The piece of information that we need from Google Analytics to help us set up Google Tag Manager is called the “Tracking ID”. This is the unique property ID that we send data to from Google Tag Manager. This can be found in the Admin Panel at the Property level.
Getting the UA Tracking ID
From your GA Homepage you want to click on Admin in the bottom left.

Once you get to the Admin Panel we want to go to the Tracking Info page.
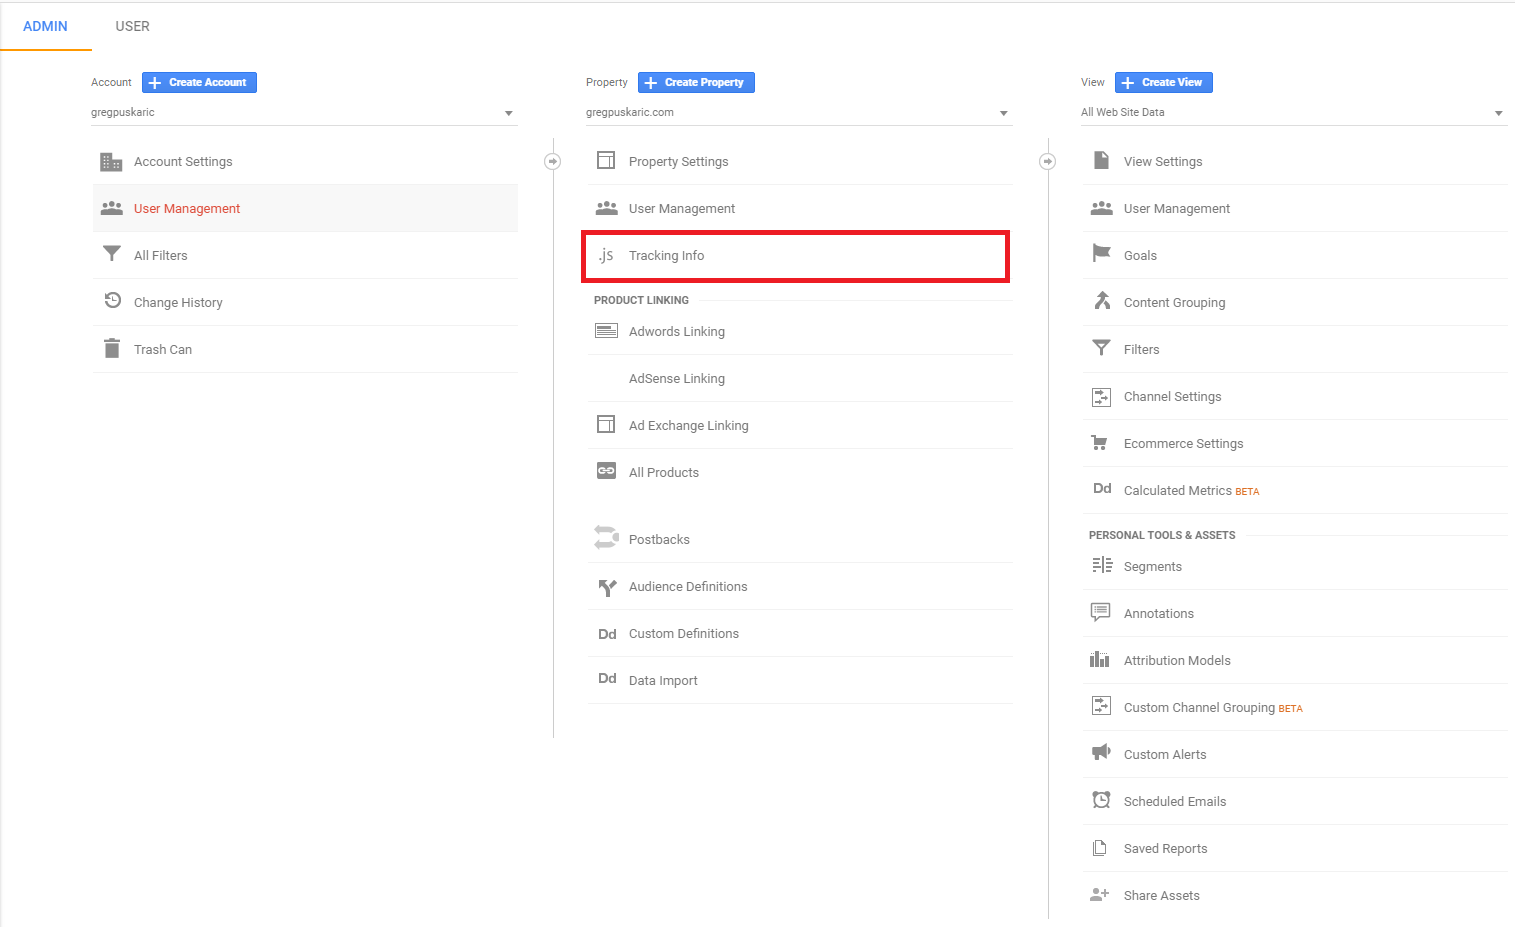
On the tracking page there will be a block of code that you can use to add GA directly to your site. However, since we are using Google Tag Manager to add GA to our site, this code is worthless to us. The only portion we care about is the UA tracking ID at the top of the page.
![]()
Google Tag Manager
Much like GA, GTM has a heirarchy structure to help organize multiple sites. Where GA has Account -> Property, GTM has Account -> Container. For beginners, you will want one container for each of your websites. There are more advanced cases where you could use multiple containers for the same website, but I’m not going to cover those today.
Once you’ve created an account and a container for your website, you should land on your account page that will list out all of your different containers.

From here we want to go into the container we are working with. We need to get to the admin panel to get our GTM include script.
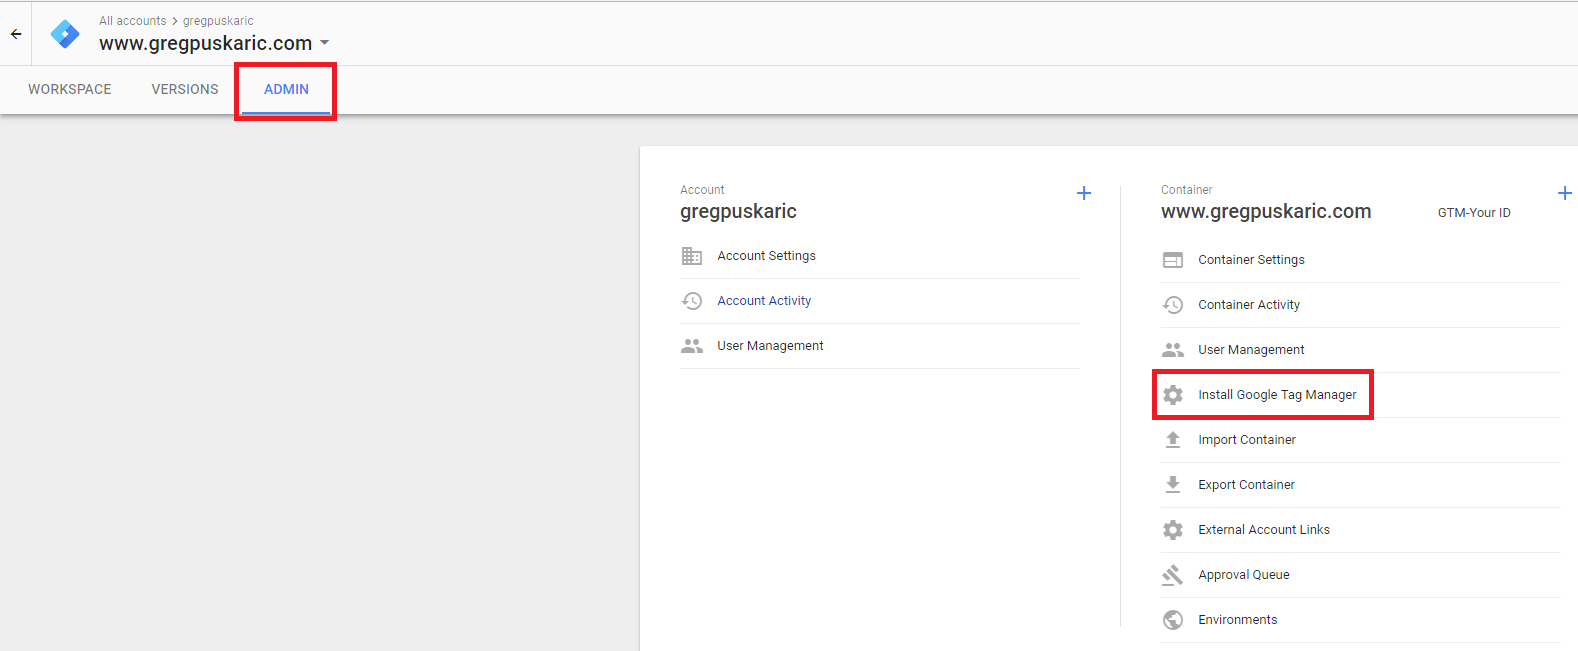
Just like the instructions on the Install Google Tag Manager page say, we need the top code block on the page. It should look something like this:
<!-- Google Tag Manager -->
<script>(function(w,d,s,l,i){w[l]=w[l]||[];w[l].push({'gtm.start':
new Date().getTime(),event:'gtm.js'});var f=d.getElementsByTagName(s)[0],
j=d.createElement(s),dl=l!='dataLayer'?'&l='+l:'';j.async=true;j.src=
'https://www.googletagmanager.com/gtm.js?id='+i+dl;f.parentNode.insertBefore(j,f);
})(window,document,'script','dataLayer','GTM-Your ID');</script>
<!-- End Google Tag Manager -->
Once you get that code snippet, you should place it in the head of every page of your site. If you place it below the <head> of the page it can cause timing issues with the analytics where GTM loads too late on the page. And if you don’t include the GTM script on every page of your site you will lose tracking on those pages. Any page without GTM on it will be a black hole for data where you cannot see any user interactions.
How to verify if GTM is firing
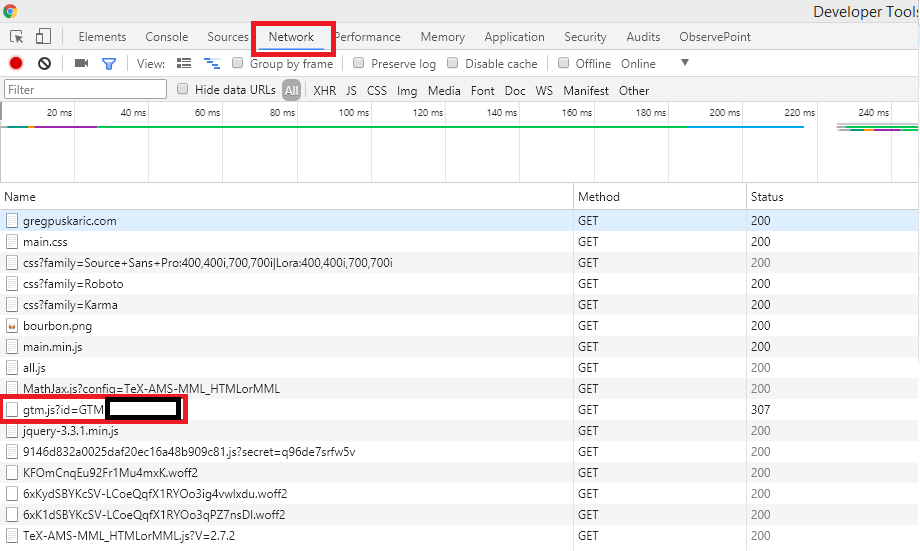
There are a couple ways to verify that GTM is present on the page, but the easiest is just by checking the network tab in your browsers developer tools. In Chrome you can just hit F12 to open the dev tools and from there you can navigate to the Network tab. You should see a list of all of the different files and scripts on the page (if not, you may need to refresh). We are interested in seeing a network call to “gtm.js” with your GTM container ID.
Now what?
So, you’ve created your GA Account and placed the global GTM script on your site. What now?
Now that you’ve placed GTM on your site, you can use the GTM container to place code on your site without making code udpates to the site itself. Tag Managers are powerful tools that allow you to place anything from Web Analytics Tools, to Media Pixels, Testing Platforms, or any other script you can think of on your site.
For this post I’m just going to start with a simple global GA tag. This will allow us to begin to track basic metrics about users to the site such as Page Views, Visits, Location, Time on Page, Bounce Rate, etc.
In order to do this, we want to go to our GTM container and add a new tag.
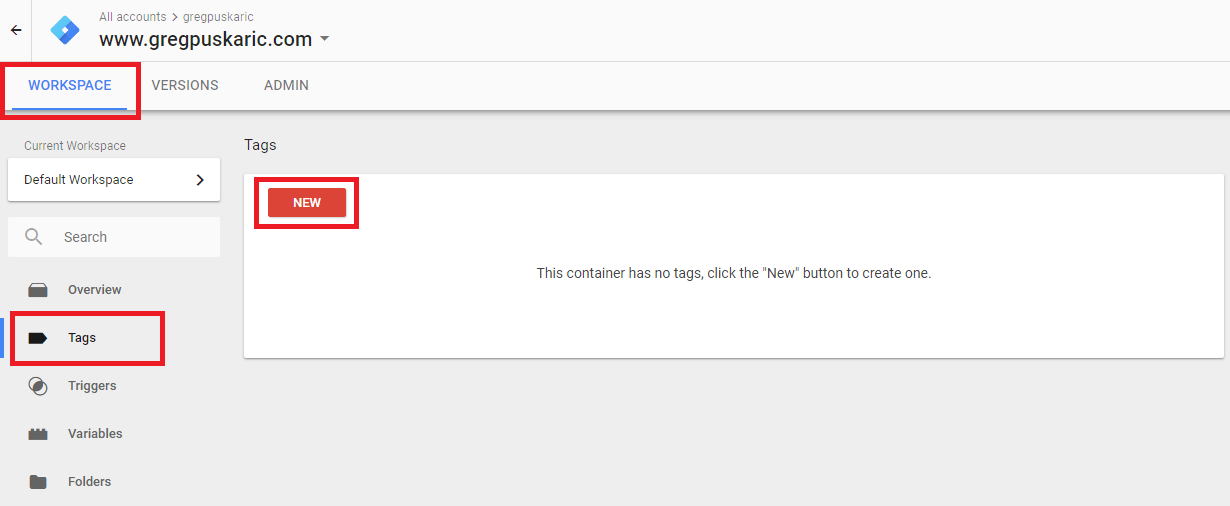
From here we want to set the tag up with the correct settings.
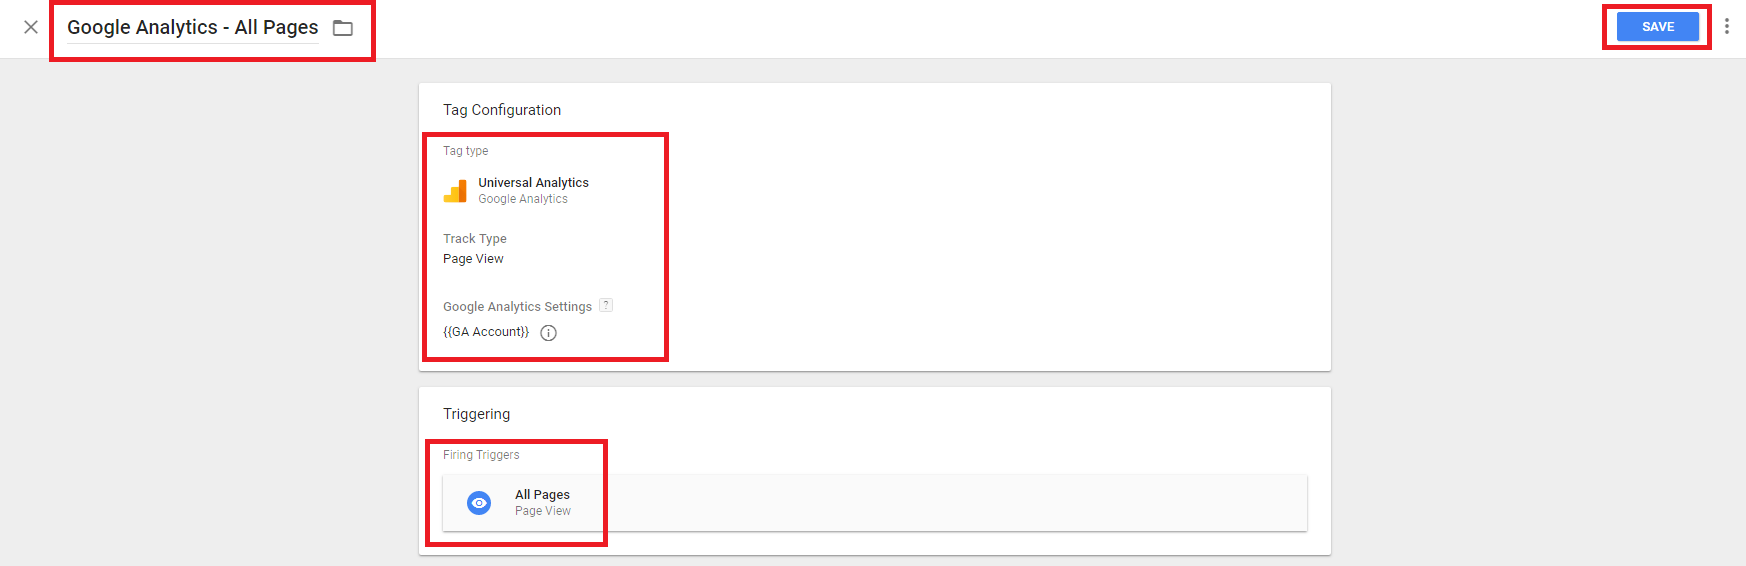
First we need to name our tag. Setting a standard naming format early on in your implementation is the best way to keep the container organized. I like to use ‘Tag Name - Condition’, but you can use whatever naming structure works for you.
For tag type we want to select “Universal Analytics”. In the options for tools you will also see “Classic Google Analytics”. This is the older version of Google Analytics, and unless you were already using it in the past, I’d recommend using the new Univeral Analytics tag.
Track type will be “Page View” since this will be our global page view tag.
Google Analytics Settings will have to be configured since this is our first tag. From the drop down you need to select “New Variable” and it will open the variable interface. The only thing you need to do here is name the variable (something like “GA Account” will do) and enter the UA Tracking ID that we gathered from Google Analytics all the way back at the beginning of this guide.
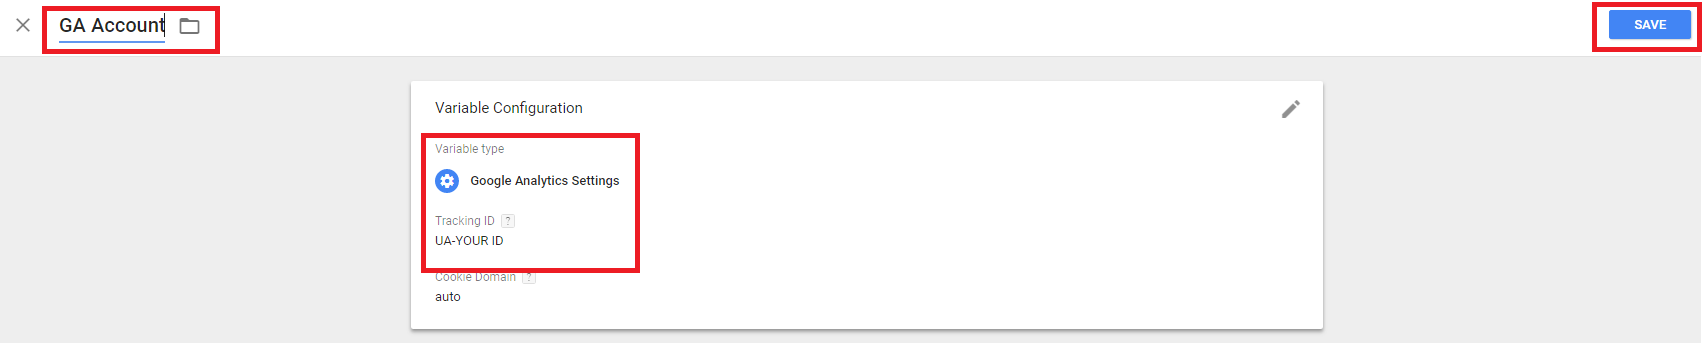
You’ll want to use this account variable on every GA Tag you create moving forward in GTM.
From there the last step is to simply select a trigger for our tag. There will only be one trigger by default, but luckily for us it is the “All Pages” trigger. Once you select a trigger your tag should look like this before saving:
Once you’ve saved your tag and gone back to the container overview page you should see your changes listed out. The only step remaining now is to publish. In the top right you will see a “Submit” button. That will open the Publish panel and you can add descriptions or names to your version before you publish it. Once you are done adding descriptions, just click the “Publish” button and you should see a summary of your version that has been publised.
Verifying our GA Global Tag
Just like with verifying GTM, there are a couple tools that you can use to verify your GA tag. I tend to prefer the ObservePoint Debugger but to keep this guide simple I will use the Chrome Developer tools that we used to verify GTM.
You should follow the same instuctions as above, but this time you want to look for a call to “google-analytics.com/r/collect”.

If you see the call going to Google Analytics, congratulations! You’ve sucessfully deployed Google Analytics onto your website. You should now be able to see data coming into your Google Analytics account.